
Breadman Plus Instruction Manual: A Comprehensive Guide
This guide provides detailed instructions for Breadman Plus models (TR4000, TR2500BC, TR520B, TR2828G),
covering setup, operation, recipes, troubleshooting, and maintenance for optimal baking.
The Breadman Plus series represents a commitment to simplifying home baking, offering a range of automatic bread makers designed for convenience and consistent results. These models – including the TR4000, TR2500BC, TR520B, and TR2828G – cater to both novice and experienced bakers. Digital manuals, readily available online via platforms like Etsy and Breadman.com, provide comprehensive support.
Each machine boasts pre-programmed cycles and customizable settings, allowing users to create a diverse array of breads, doughs, and sweet treats. The series emphasizes user-friendliness, with clear control panels and detailed instruction manuals. Understanding your specific model is key to unlocking its full potential, ensuring delicious, homemade bread with minimal effort. This guide will navigate you through each step.
Understanding Your Breadman Model (TR4000, TR2500BC, TR520B, TR2828G)
Each Breadman Plus model, whether it’s the TR4000 Ultimate Plus with its 132 pages of recipes, the TR2500BC with 122 pages, or the TR520B/TR2828G, shares core functionalities but possesses unique features. Familiarize yourself with your specific model’s control panel and available cycles.
Digital manuals, accessible as PDFs from Etsy or Breadman.com, are crucial for detailed operation. Note that illustrations within the instruction manual are for informational purposes. Understanding the placement of components, like the bread pan and kneading paddle, is vital. Before first use, perform the “Rapid White Cycle” burn-off to eliminate manufacturing oils, as outlined in the manual.

Getting Started
Begin by unpacking your Breadman machine, performing the initial setup, and completing the first-time burn-off cycle (Rapid White) for optimal performance.
Unpacking and Initial Setup
Carefully unpack your Breadman Cool Touch Automatic Bread Baker, ensuring all components are present. Remove any clear plastic film protecting the machine during shipment. Before first use, thoroughly clean the bread pan and kneading paddle with warm, soapy water.
Place the bread maker on a stable, level surface, away from water sources and flammable materials. Plug the appliance into a grounded 120V, 60Hz outlet. It’s crucial to familiarize yourself with the power requirements for safe operation. Ensure the bread pan and paddle are correctly installed before proceeding. The illustrations in the instruction manual are provided for informational purposes only, aiding in proper setup and understanding of the machine’s components.
First-Time Use: The Burn-Off Cycle (Rapid White Cycle)
Before baking your first loaf, it’s essential to run the “Rapid White” cycle – a burn-off cycle – to eliminate any manufacturing oils or residues. This initial cycle ensures a clean and odor-free baking experience. Do not add any ingredients during this process; simply select the Rapid White program on the control panel and start the machine.
This cycle will run through a complete kneading and baking process without any dough. Allow the cycle to complete fully. This initial burn-off is a crucial step for optimal performance and to prevent any unwanted flavors from affecting your future baked goods. Following this, your Breadman is ready for delicious bread!
Power Requirements and Safety Precautions
Ensure your Breadman machine is plugged into a standard 120V, 60Hz electrical outlet. Avoid using extension cords if possible; if necessary, use a heavy-duty extension cord rated for the appliance’s wattage. Always unplug the machine before cleaning or when not in use. Never immerse the bread maker, cord, or plug in water or other liquids.
To prevent electrical shock, do not operate with a damaged cord or plug. Keep the appliance away from heat sources and flammable materials. Supervise children when the machine is in operation. Do not touch hot surfaces; use oven mitts when handling the bread pan or kneading paddle after baking.

Key Components and Their Functions
This section details the bread pan, kneading paddle, and control panel, alongside the ingredient dispenser (if equipped), explaining each component’s role in the baking process.
Bread Pan and Kneading Paddle
The bread pan is crucial for shaping the loaf during baking, ensuring even heat distribution for a perfectly formed bread. It’s designed for easy removal of the finished product. The kneading paddle, typically made of metal, mixes and kneads the ingredients, developing gluten for a desirable texture.
Ensure both are thoroughly cleaned after each use to prevent residue buildup. Proper attachment of the paddle is vital for effective kneading; always confirm it’s securely fastened to the motor shaft. Some models may have non-stick coatings on the pan, requiring gentle cleaning to avoid damage. Regularly inspect both components for wear and tear, replacing them when necessary to maintain optimal performance and bread quality. Refer to the manual for specific cleaning and maintenance instructions related to your Breadman model.
Control Panel Overview
The control panel features buttons for cycle selection (Basic, Whole Wheat, Rapid, Dough, etc.), crust control (Light, Medium, Dark), and start/stop functions. A digital display indicates cycle time remaining and selected settings. The delay timer allows for pre-programmed baking, ensuring fresh bread is ready when desired.
Understanding each button’s function is key to customizing your baking experience. The panel may also include options for ingredient dispensing and keep-warm features. Refer to your specific model’s manual for a detailed diagram and explanation of each control. Familiarize yourself with the error code indicators for quick troubleshooting. Proper use of the control panel unlocks the full potential of your Breadman machine.
Ingredient Dispenser (If Applicable)
Certain Breadman Plus models feature an automatic ingredient dispenser, simplifying recipes requiring additions like nuts, seeds, or fruit. This compartment holds ingredients and releases them into the dough at the optimal mixing stage. Always ensure the dispenser is clean and free of obstructions before use.
Follow recipe instructions carefully regarding ingredient quantity and dispenser timing. Overfilling can cause malfunctions, while underfilling may result in uneven distribution. The dispenser enhances convenience, but manual addition is always an option. Refer to your model’s manual for specific dispenser capacity and cleaning guidelines. Proper usage ensures consistent and delicious results.

Operating Instructions
This section details the bread-making process, utilizing pre-programmed cycles and offering customization options for baking settings, ensuring perfect loaves every time.
Basic Bread Making Process
Begin by adding ingredients to the bread pan, following a recipe’s specified order – typically liquids first, then dry ingredients, with yeast last. Ensure the kneading paddle is securely in place. Carefully insert the pan into the bread machine. Select the desired cycle; for a standard loaf, the ‘Basic’ or ‘White Bread’ cycle is suitable.
Choose your loaf size and crust color using the control panel. Press ‘Start’ to initiate the process. The machine will automatically knead, rise, and bake the bread. Avoid opening the lid during baking to maintain consistent temperature. Once complete, carefully remove the bread pan using oven mitts. Allow the loaf to cool completely before slicing and enjoying your freshly baked bread!
Using Pre-Programmed Cycles
The Breadman Plus offers various pre-programmed cycles for diverse baking needs. The ‘Rapid White’ cycle is ideal for a quick loaf, while ‘Whole Wheat’ optimizes baking for denser doughs. ‘Sweet Bread’ is perfect for enriched doughs like brioche, and ‘Dough’ allows for rising only, for baking in a conventional oven.
To utilize a cycle, simply select it via the control panel. Adjust loaf size and crust color as desired. Refer to the manual for specific ingredient recommendations for each cycle. Some cycles may have additional settings, like a fruit and nut dispenser option. Experiment with different cycles to discover your favorite baking results!
Customizing Baking Settings
Breadman Plus machines allow customization beyond pre-programmed cycles. Adjust loaf size – typically ranging from 1.5 to 2 pounds – to suit your needs. Crust color settings offer options from light to dark, influencing the final bread appearance. Some models permit adjusting the amount of yeast or sugar for personalized recipes.
Explore options like altering the rise time for specific doughs or utilizing the delay timer for fresh bread in the morning. Remember to carefully monitor adjustments, as significant changes can affect the final product. Refer to the manual for detailed guidance on each customizable setting.
Recipes and Baking Guides
Explore diverse recipes, including basic white, whole wheat, and sweet bread variations, alongside dough options, utilizing the Breadman Plus machine for delicious results.
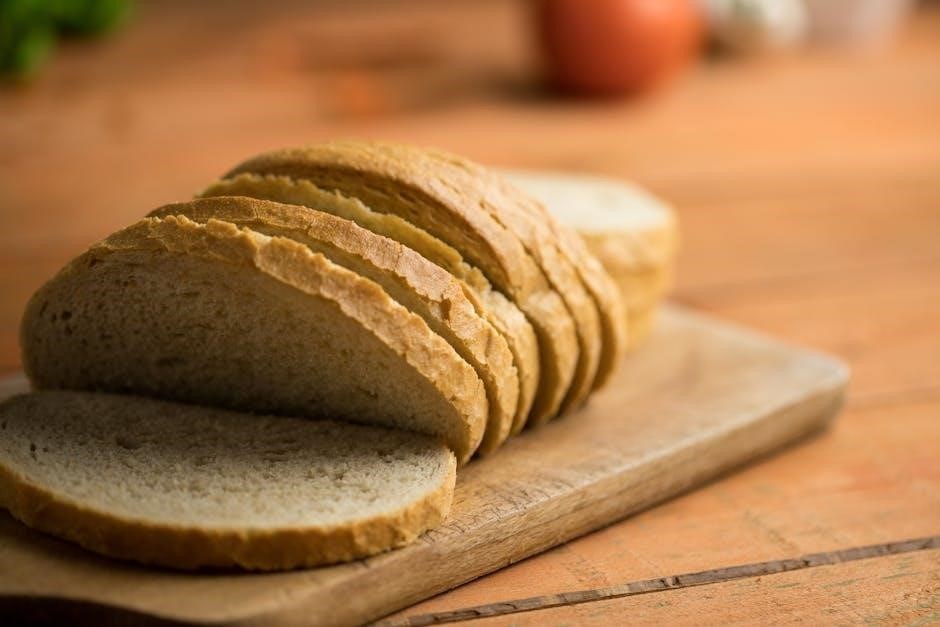
Basic White Bread Recipe
Yields: 1 loaf (approximately 1.5 lbs)
Ingredients: 1 ¼ cups (300ml) warm water, 3 ½ cups (420g) bread flour, 2 tablespoons (30ml) sugar, 1 ½ teaspoons (7g) salt, 3 tablespoons (45ml) softened butter or margarine, 2 ¼ teaspoons (7g) active dry yeast.
Instructions: Add ingredients to the bread pan in the order listed (water, flour, sugar, salt, butter, yeast). Select the ‘Basic’ cycle. Press ‘Start’. Monitor the kneading process; adjust water/flour if needed for proper dough consistency. Upon cycle completion, carefully remove the loaf from the pan and let cool completely before slicing and enjoying freshly baked bread. This recipe is a great starting point for mastering your Breadman machine!
Whole Wheat Bread Recipe
Yields: 1 loaf (approximately 1.5 lbs)
Ingredients: 1 ¼ cups (300ml) warm water, 2 cups (240g) bread flour, 1 ½ cups (180g) whole wheat flour, 2 tablespoons (30ml) honey, 1 ½ teaspoons (7g) salt, 2 tablespoons (30ml) vegetable oil, 2 ¼ teaspoons (7g) active dry yeast.
Instructions: Add ingredients to the bread pan in the order listed (water, bread flour, whole wheat flour, honey, salt, oil, yeast). Select the ‘Whole Wheat’ cycle. Press ‘Start’. Whole wheat flour absorbs more liquid, so check dough consistency. If too dry, add water, one tablespoon at a time. Once baked, cool completely before slicing. Enjoy a nutritious and flavorful loaf made easily with your Breadman!
Sweet Bread and Dough Recipes
Cinnamon Raisin Bread: Combine 1 ¼ cups warm milk, ¼ cup sugar, ¼ cup butter, 1 egg, 3 cups bread flour, 1 tsp salt, 2 ¼ tsp yeast. Add ½ cup raisins & 1 tbsp cinnamon after kneading. Select ‘Sweet’ cycle.
Dough for Rolls: Use 1 cup warm milk, ¼ cup sugar, ¼ cup butter, 1 egg, 3 ¼ cups bread flour, 1 tsp salt, 2 ¼ tsp yeast. Select ‘Dough’ cycle. After rising, shape into rolls and bake separately.
Brioche Dough: For a richer dough, increase butter & egg quantities. Your Breadman simplifies sweet baking, offering pre-programmed cycles for consistent results!
Troubleshooting

This section addresses common issues, error codes, and solutions for your Breadman Plus machine, including guidance on handling unexpected power outages during baking.
Common Issues and Solutions
Experiencing problems with your Breadman Plus? Several common issues can arise during bread making. If your dough isn’t rising, ensure your yeast is fresh and properly activated. A collapsed loaf often indicates too much liquid or insufficient gluten development – adjust ingredient amounts accordingly.
Burnt crusts can be resolved by reducing baking time or sugar content. If the kneading paddle remains stuck in the bread, try a longer soak in warm water before removal. Error codes displayed on the control panel signal specific malfunctions; refer to the ‘Error Codes and Their Meanings’ section for detailed explanations. Always unplug the machine before attempting any manual intervention or cleaning. Regularly check the bread pan and paddle for damage, as this can affect performance.
Error Codes and Their Meanings
Decoding error messages is crucial for troubleshooting. While specific codes vary by model (TR4000, TR2500BC, TR520B, TR2828G), common errors indicate issues like a stalled motor, a faulty temperature sensor, or a power surge. An “Err 1” code might suggest a problem with the heating element, while “Err 2” could point to a sensor malfunction.
If an error appears, immediately stop the cycle and unplug the bread maker. Consult the complete manual (available as a PDF on Breadman.com or Etsy) for a comprehensive list of codes and their corresponding solutions. Attempting to operate the machine with an active error code could cause further damage. Contact customer support if the issue persists after troubleshooting.
What to Do During a Power Outage
A power interruption during a baking cycle can be concerning. The Breadman Plus models (TR4000, TR2500BC, TR520B, TR2828G) are designed to minimize issues, but immediate action is recommended. If the outage is brief, the machine may resume automatically upon power restoration. However, for extended outages, do not attempt to restart the cycle manually.
Assess the dough’s stage. If significantly underbaked, discard it for safety. If nearly complete, you might cautiously resume baking once power returns, but monitor closely. Refer to the instruction manual (found on Breadman.com or Etsy) for specific guidance. Prioritize food safety and avoid consuming potentially undercooked bread.

Maintenance and Care
Regular cleaning and proper storage, as detailed in the manual (Breadman.com, Etsy), ensure longevity. Replace the paddle and pan when needed for optimal performance.
Cleaning Your Breadman Machine
Thorough cleaning after each use is crucial for maintaining your Breadman machine’s performance and hygiene. Always unplug the appliance and allow it to cool completely before cleaning. The bread pan and kneading paddle are typically dishwasher-safe, but hand washing with warm, soapy water is also effective.
Wipe the exterior of the bread maker with a damp cloth. Avoid abrasive cleaners, as they can damage the finish. For stubborn residue inside the baking cavity, use a slightly damp cloth. Ensure no water enters the electrical components. Refer to the instruction manual (available on Breadman.com and Etsy) for detailed cleaning instructions specific to your model (TR4000, TR2500BC, TR520B, TR2828G). Proper cleaning extends the life of your appliance.
Storing Your Breadman Machine
Proper storage ensures your Breadman machine remains in excellent condition when not in use. Before storing, ensure the appliance is completely clean and dry, following the cleaning instructions detailed in the manual (found on Breadman.com and Etsy). Store the bread maker in a cool, dry place, away from direct sunlight and extreme temperatures.
It’s advisable to store the machine with the power cord neatly coiled and secured. Avoid placing heavy objects on top of the bread maker, as this could cause damage. For long-term storage, consider placing the unit in its original packaging, if available, to protect it from dust and scratches. Models like TR4000, TR2500BC, TR520B, and TR2828G benefit from careful storage.
Replacing Parts (Paddle, Pan)
Maintaining your Breadman machine often involves replacing wear-and-tear parts like the kneading paddle and bread pan. These components are crucial for optimal performance across models such as TR4000, TR2500BC, TR520B, and TR2828G; Replacement parts can be sourced from Breadman.com or through online retailers like Etsy, offering both original and compatible options.
When replacing the kneading paddle, ensure it’s securely attached to the drive shaft. For the bread pan, verify it fits snugly within the machine. Regularly inspecting these parts and replacing them when damaged ensures consistent baking results and extends the lifespan of your Breadman appliance. Refer to your digital manual for specific part numbers.
Advanced Features
Explore enhanced functionalities like the delay timer, keep-warm function, and gluten-free baking options available on your Breadman Plus model for versatile results.
Delay Timer Function
The Delay Timer feature allows convenient, pre-programmed baking, fitting fresh bread into your schedule. Simply calculate the desired finish time and set the timer accordingly. This function initiates a delayed start, ensuring warm bread is ready when you need it. Remember to account for total cycle time – including kneading, rising, and baking – when setting the delay.
For ingredients requiring refrigeration, it’s crucial to use cold liquids and avoid perishable items like eggs or milk if the delay exceeds several hours. Proper ingredient temperature maintains dough quality and prevents spoilage. The Breadman Plus automatically handles the rest, delivering perfectly baked bread at your specified time. Experiment with this feature to enjoy freshly baked bread effortlessly!
Keep Warm Function
The Keep Warm function is a valuable asset, maintaining bread temperature for up to an hour after the baking cycle completes. This prevents your freshly baked loaf from cooling prematurely, ensuring it remains soft and enjoyable. It’s ideal for situations where you’re not immediately ready to enjoy the bread, or if family members finish eating at different times.
During the Keep Warm cycle, the heating element operates intermittently to preserve warmth without over-baking or drying out the bread. While convenient, prolonged use isn’t recommended, as it can slightly alter the bread’s texture. For extended storage, allow the bread to cool completely before wrapping and freezing.
Gluten-Free Baking Options
Many Breadman Plus models offer dedicated gluten-free cycles, catering to individuals with dietary restrictions or preferences. These cycles are specifically programmed to accommodate gluten-free flour blends, which often require different mixing and rising times compared to traditional wheat flour.
Successful gluten-free baking relies on using a high-quality gluten-free bread flour blend containing xanthan gum or a similar binding agent. Carefully follow recipes designed for gluten-free bread machines, as ingredient ratios and cycle settings are crucial. Experimentation may be needed to achieve optimal results, considering different flour blends yield varying textures.

Digital Manual Access
Access PDF manuals for your Breadman Plus model on Etsy or Breadman.com, offering convenient digital copies for easy reference and recipe guides.
Locating and Downloading PDF Manuals (Etsy, Breadman.com)
Finding your Breadman Plus manual digitally is straightforward. Etsy offers downloadable PDF versions of manuals, including the TR4000 Ultimate Plus (132 pages with recipes) and the TR2500BC Ultimate Plus (122 pages). After a secure purchase, you’ll gain immediate access to a high-quality digital file compatible with any device.
Alternatively, visit the official Breadman website (breadman.com) for direct access to manuals for models like TR520B, TR520RD, TR520W, and TR520X. These resources provide comprehensive instructions, recipes, and troubleshooting guidance. Ensure you select the correct model number to download the appropriate manual, enabling you to fully utilize your bread maker’s features.
Navigating the Digital Manual
Your Breadman Plus digital manual is designed for easy access to information. Begin by reviewing the Table of Contents to quickly locate specific sections, such as safety precautions or baking instructions. Utilize the search function (if available in your PDF reader) to find keywords like “delay timer” or “error codes”.
Pay close attention to illustrations, as they are provided for informational purposes only and clarify operational steps. The manual details the initial burn-off cycle (Rapid White Cycle) to eliminate manufacturing oils. Familiarize yourself with troubleshooting sections for common issues and power outage procedures, ensuring a smooth baking experience.